The following significant changes have been made:
- Home Screen
- Projects
- Correction Stream Icon
- Setup
- Stake & Collect Prepare Screens Removed
- Base/Rover Setup
- JAVAD CORS Services
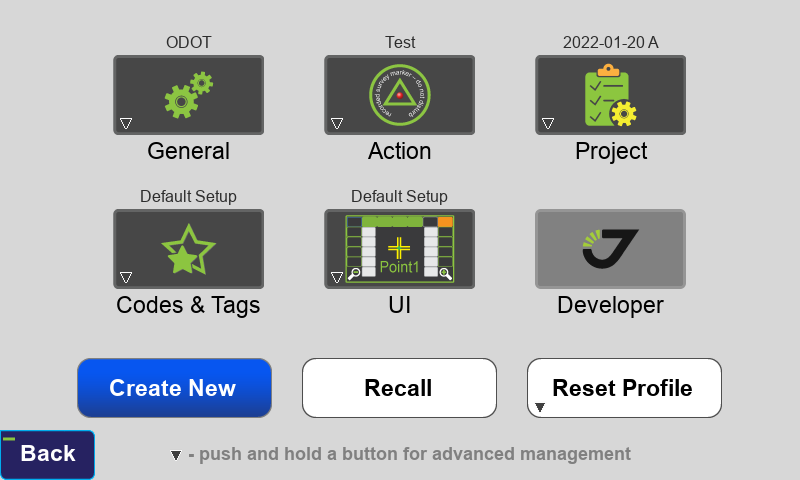
¶ Home Screen
The icons on the Home screen have been updated.
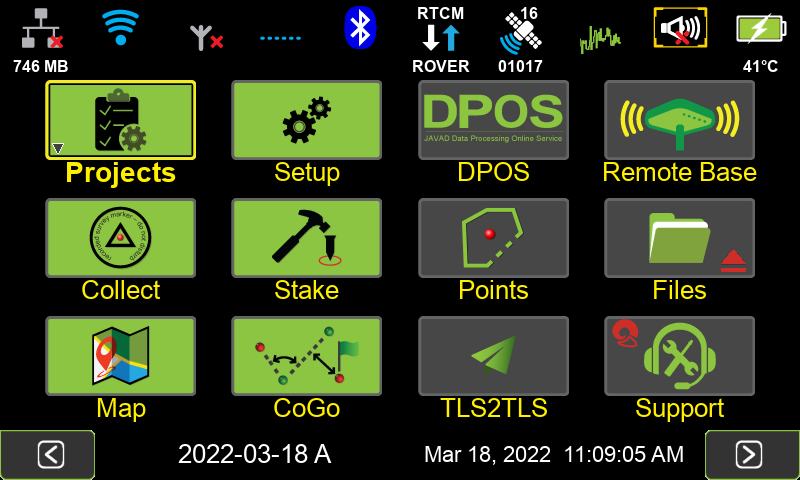
Base/Rover has now been renamed Remote Base.
Localize can now be found by clicking the Localize button 
found in Home Screen 2 > > Coord. Sys
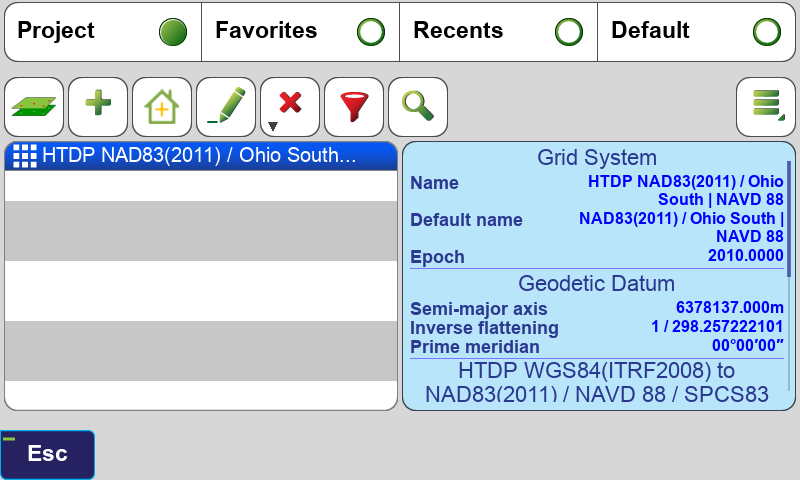
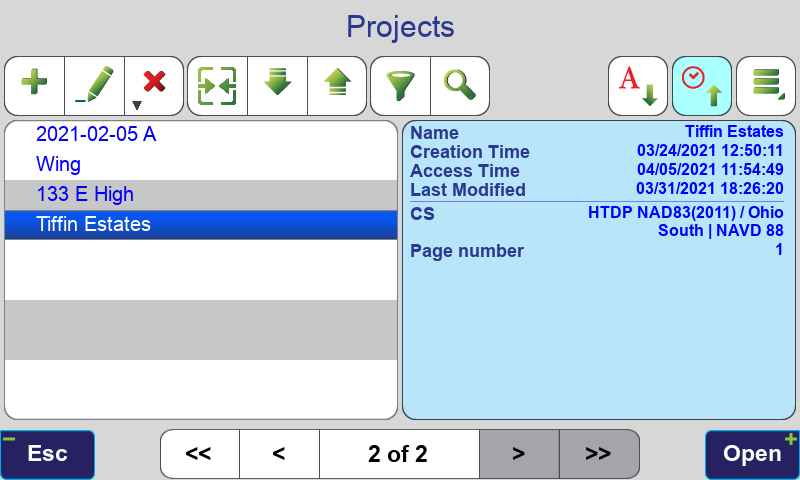
¶ Projects
Projects are now opened from the Home screen. A long click on the Project icon on the Home screen edits the current project. A new project can also be created by tapping the  software button.
¶ Correction Stream Icon
Information about the corrections stream can now be found by tapping the Correction Stream Icon  at the top of the of home screen.
The General Group profile is no longer involved with RTK correction source selections. The selection of the corrections source must be selected in this screen. The same General Group profile can now be used for multiple types of corrections.
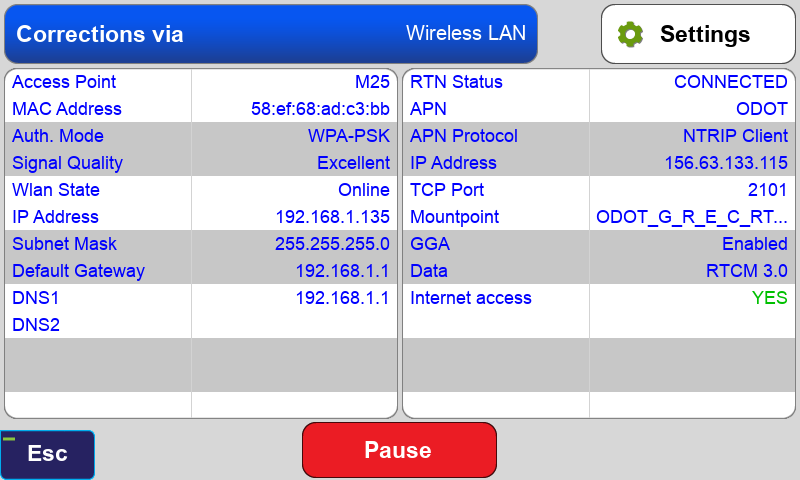
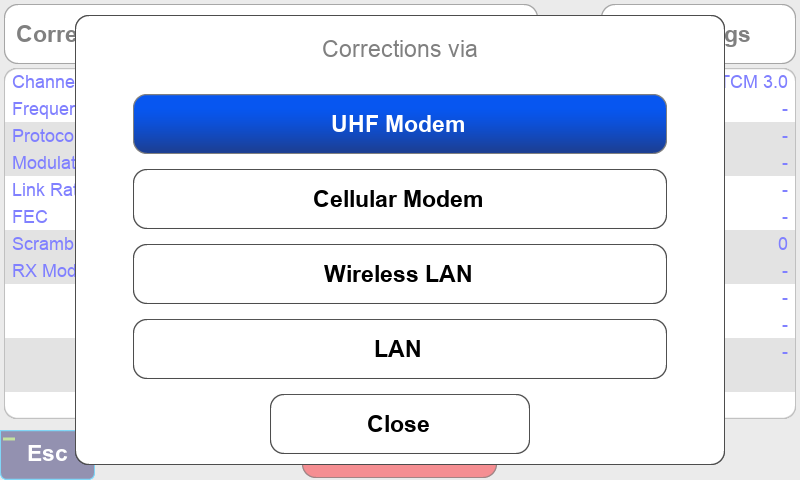
The source of the correction stream can now be managed with the Correction via button.
The Settings button shows the basic settings for the communications channel.

Settings for a RTN through Wireless LAN
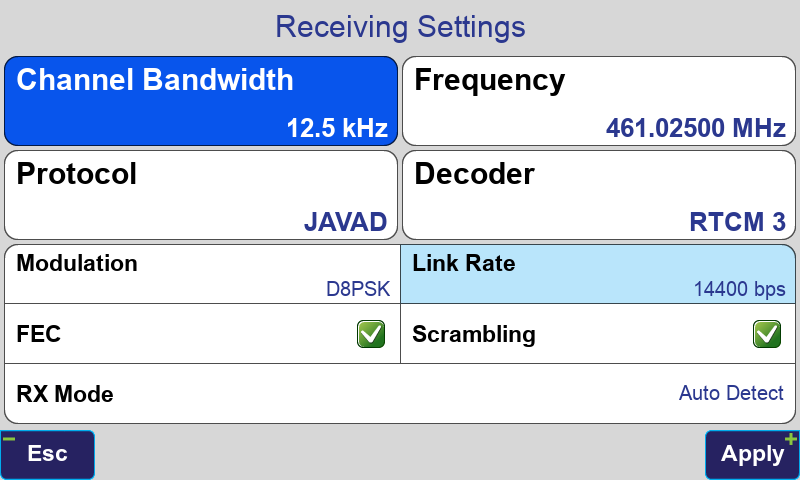
Settings for a UHF Modem
These same settings can also be accessed in the Stake and Collect Action Screens by tapping the Communications Status button  (W for WiFi)
  (U for UHF).
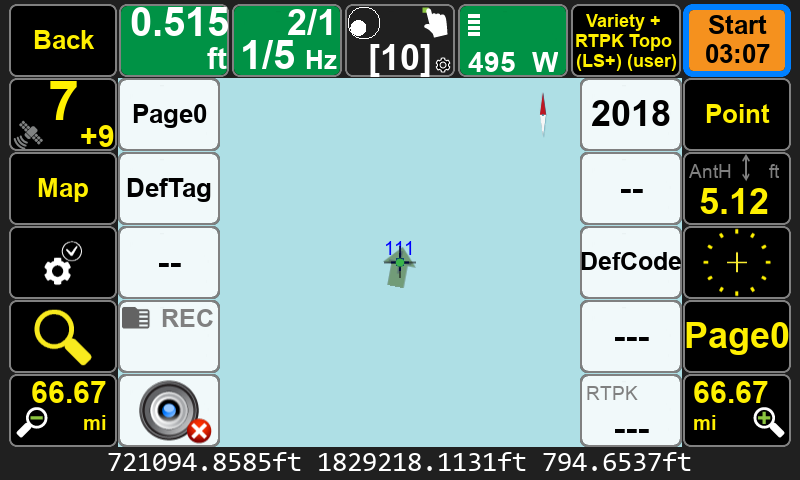
The user should always pay attention to the Base ID and correction source shown on the Communication Status button as it is now easier to switch between correction sources.
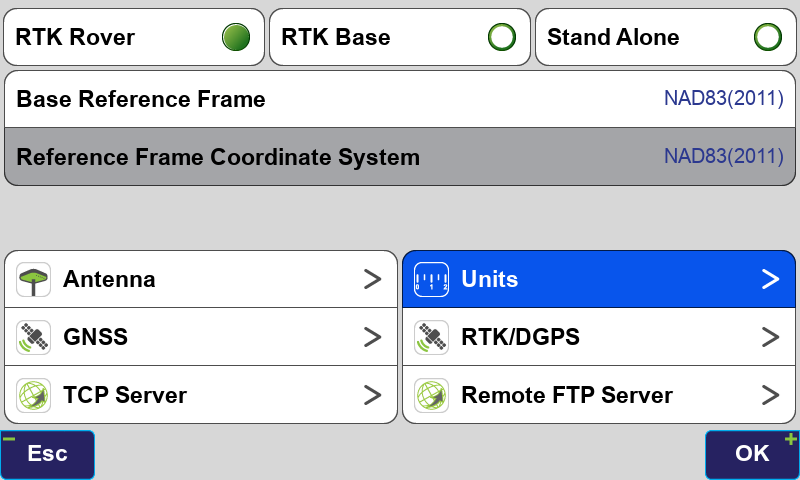
¶ Setup Screen
The Setup screen has been updated.
The General Group profile is now only used to control the Units and RTK settings. The General Group profile is no longer involved with RTK correction source selections. The new Correction Stream Icon
A short tap of the icons opens the settings screen for the current profile.
General Group Settings
To recall or create a new profile long tap on one of the icons. It is recommended that the *General Group *profiles previously used for switching between different correction sources be deleted. Unused Action profiles should also be deleted.
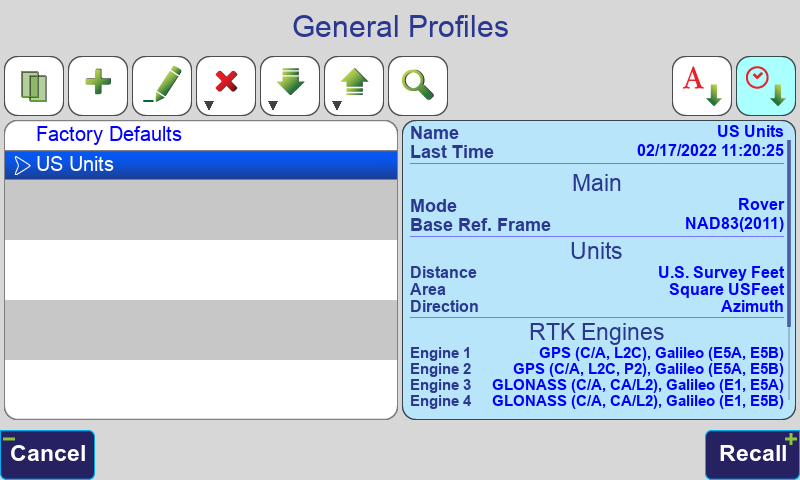
A new profile can also be created by tapping the software button.
To recall a profile select it and press the Recall button.
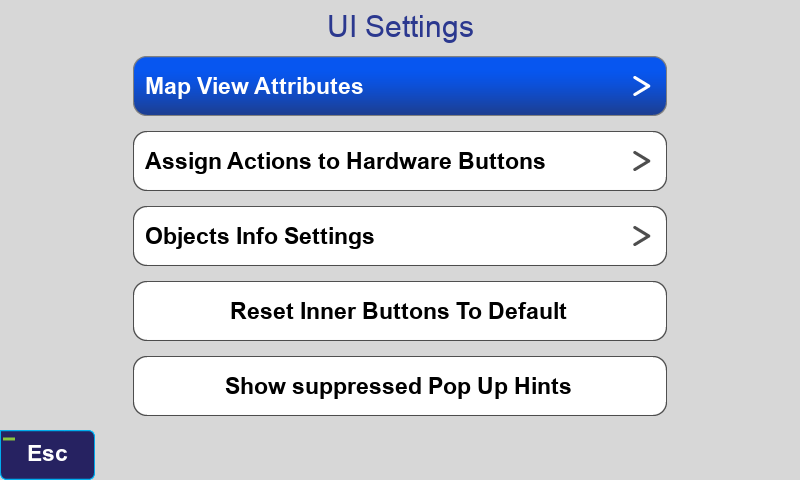
A new group for UI (User Interface) settings has been created.
In the Action Profiles selection screen the Predefined Profiles are shown in purple. They cannot be opened, you must first create a copy of the desired profile and then you can open the copy.
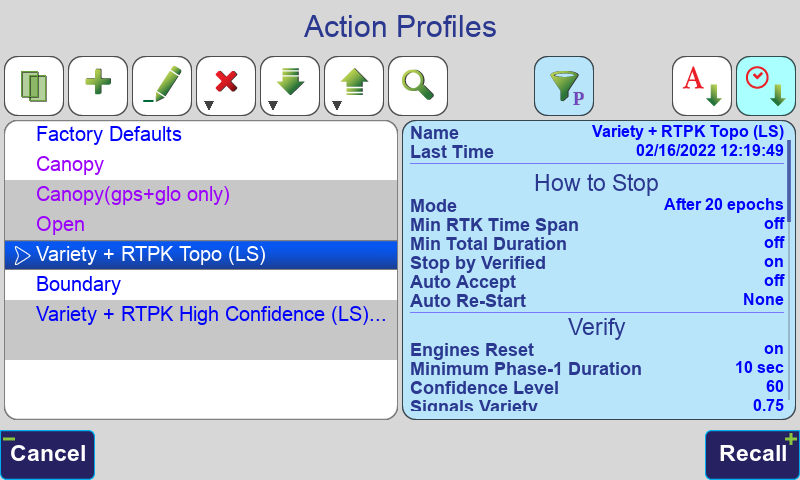
The Predefined Profiles Filter  button can be used to hide the Predefined Profiles.
¶ Stake & Collect Prepare Screens Removed
The Stake and Collect Prepare screens have been removed. All the fields and settings that were previously in these screens can now be accessed in the Action screens.
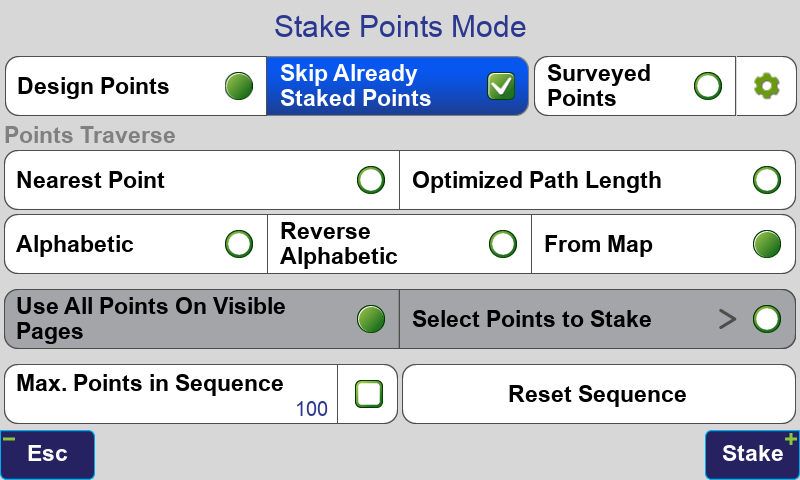
The options to stake a line or change the Stake Points Mode are now accessed with the Stake Mode button below Start in the Stake Action screen.
¶ Base / Rover Setup
The Base / Rover Setup screen has been updated.
Connecting to the base and starting the base now takes longer than it previously did. Now when connecting to base, it is waiting for the internal radio/cellular modem driver to be ready and information about the module is requested.
When starting base it is waiting for the modem to start transmitting.
The Base receiver can be managed by tapping its button under Start / Stop Base. The satellite systems that the base is configured to transmit is shown in this button.

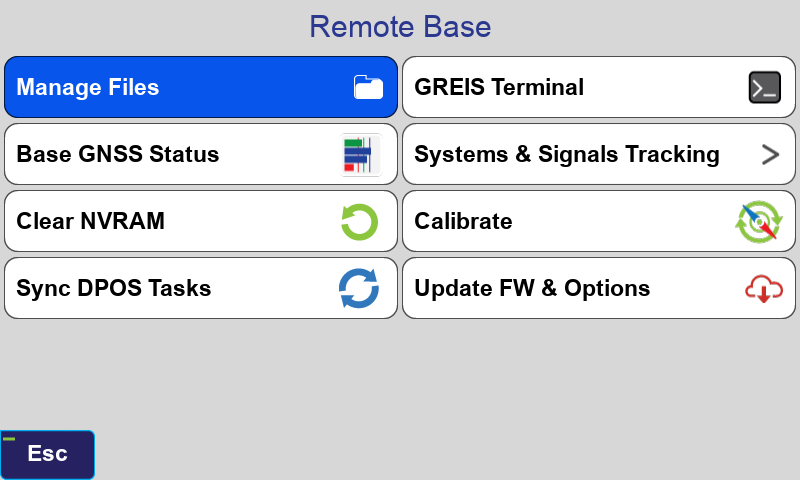
The Firmware on the base should be updated if it is not up to date with the Update FW & Options button. Old firmware may cause the internal radio not to be recognized.
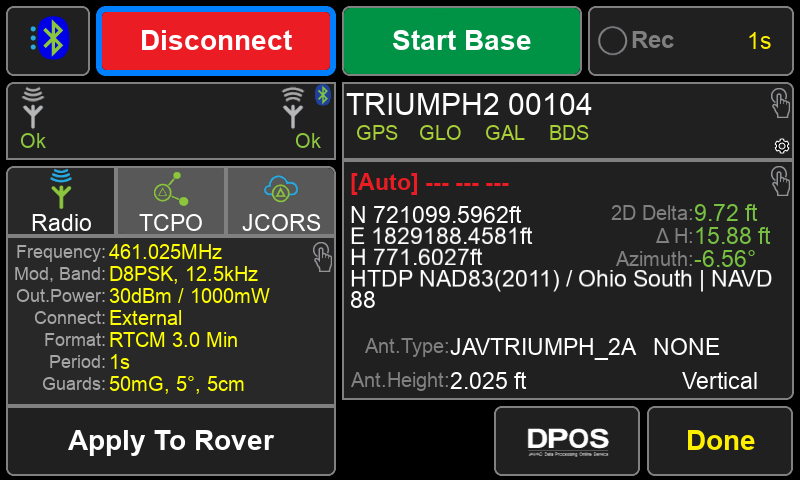
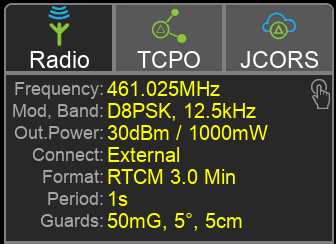
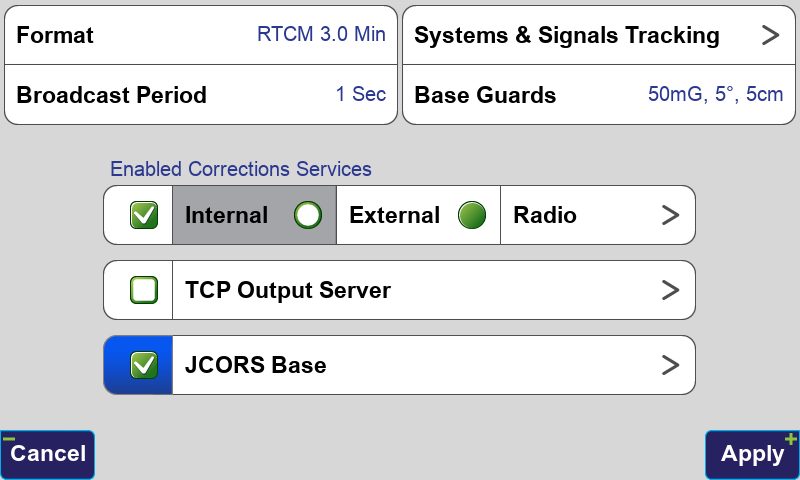
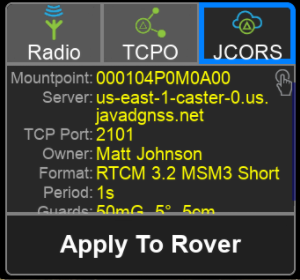
The Communication Parameters box now has three options to view the settings for Radio, TCPO and JCORS.
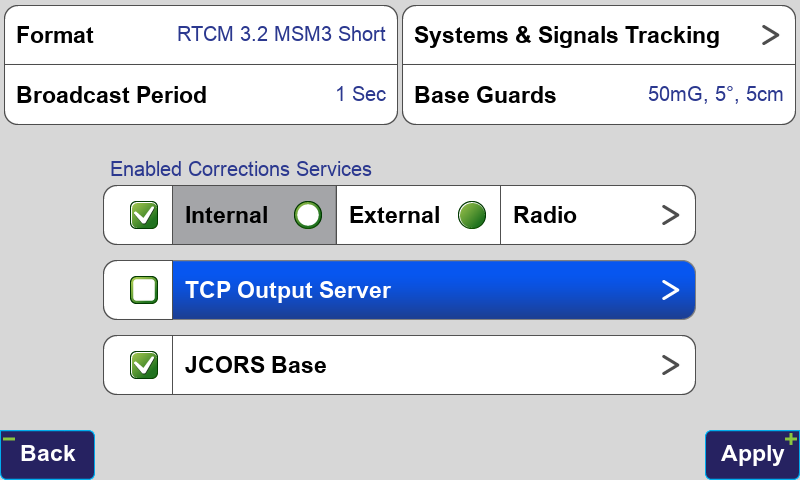
Tapping this box open the Base Configuration screen. The options you wish to use need to be checked. Multiple correction stream sources can now be selected. You can have your base broadcasting both through a radio and through TCP or JCORS.
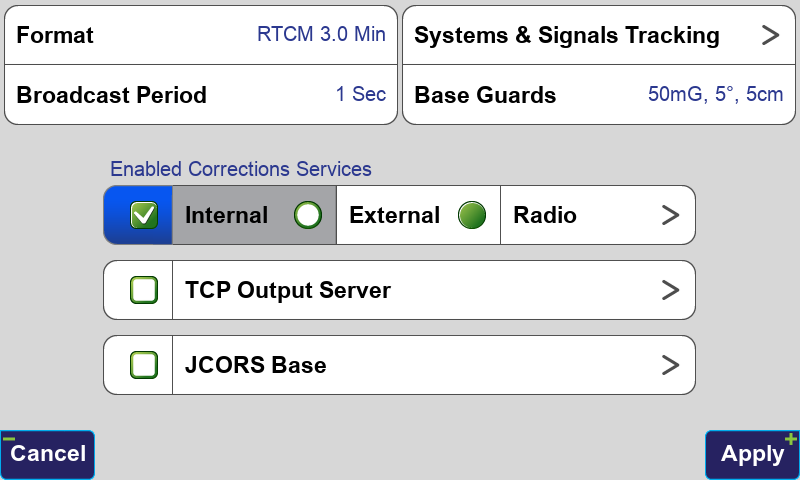
For GPS and GLONASS, the format should be set to RTCM 3.0 Min. For GPS, GLONASS Galileo and BeiDou, the format should be set to RTCM 3.2 MSM3 Short.
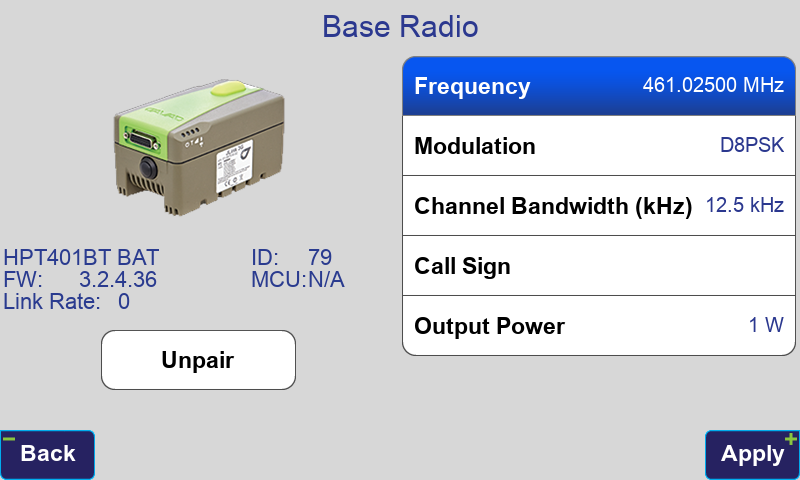
To configure the radio parameters tap the Radio button.
Similarly, TCP and JCORS can be configured by tapping their buttons. TCP profiles are configured with the local IP address of the base by default. If you are using WiFi hotspot to connect your base to the internet you will need to determine the external IP address of the hotspot and update the IP address field to external IP address of the hotspot. The external IP address can detemined by visiting https://www.whatismyip.com with a device connected to the internet through the hotspot.
Before starting the base select the tab for the corrections source (Radio, TCPO or JCORS) that you want to use for the rover and press Apply To Rover to select this correction source for the rover.
¶ JAVAD CORS Services
JCORS is a new service that allows your receiver to act as a CORS (Continuously Operation Reference Station) without the need for having a static IP address. The base receiver connects to a cloud server that then broadcast the correction stream through the internet. This service is free at the time but there may be a charge for this service in the future.
To begin setting up JCORS tap the JCORS Base button in the Base Configuration screen Base / Rover Setup.
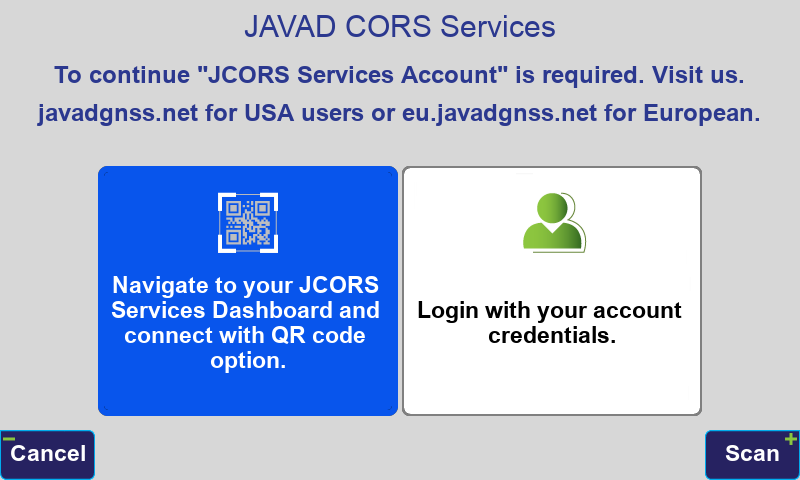
JCORS needs to be setup at https://community.us.javadgnss.net/ (for US customers) or https://javad.eu.javadgnss.net/ (for European customers). After creating an account and logging in click OPEN DASHBOARD.
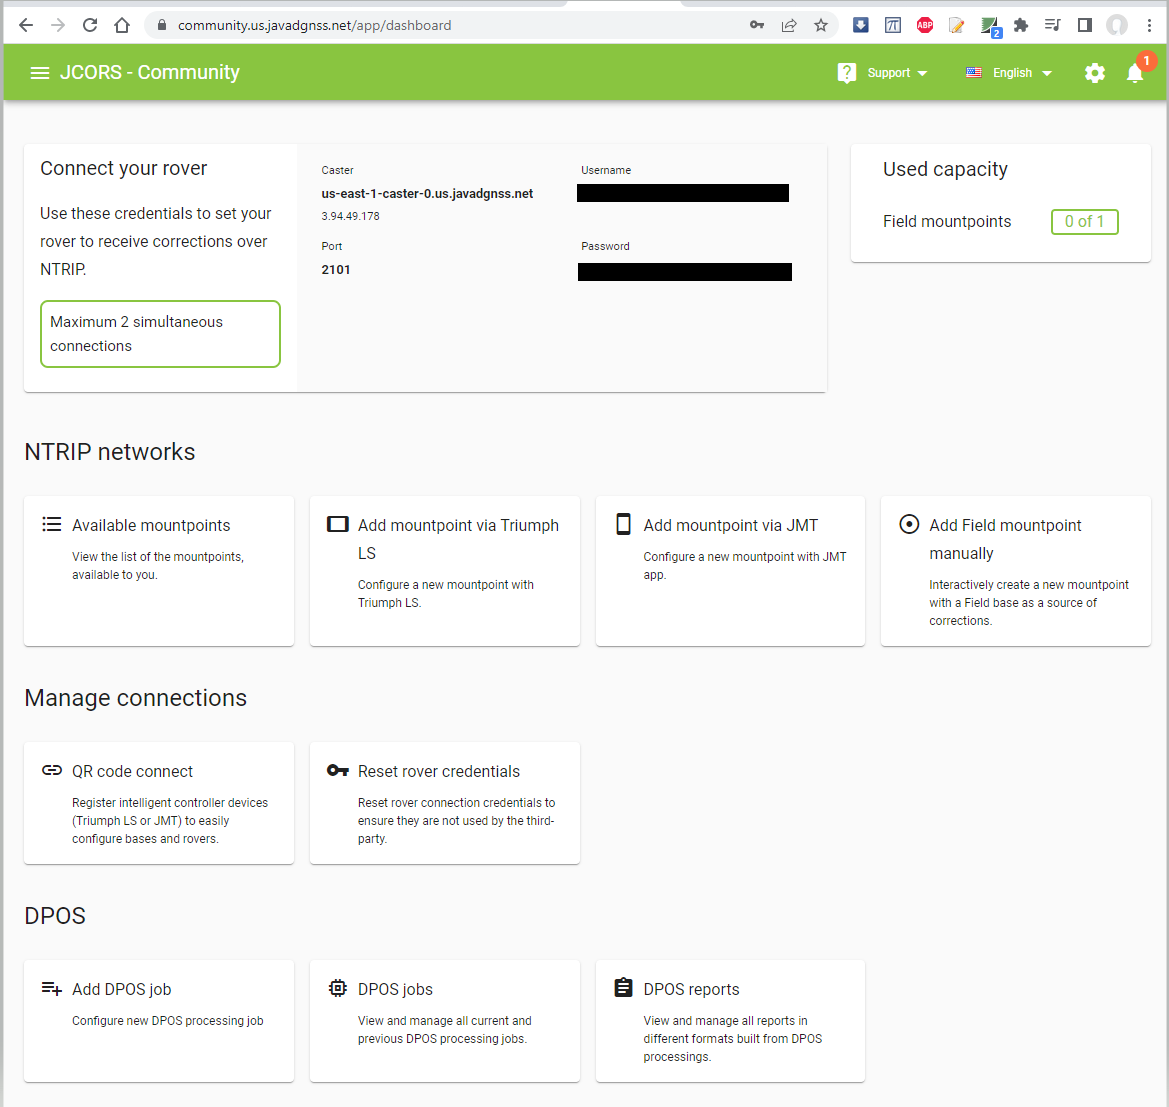
Click the QR code connect button and select this option in J-Field to open the camera and scan the QR code that appears in the web browser.
This will create the mountpoint on the server.
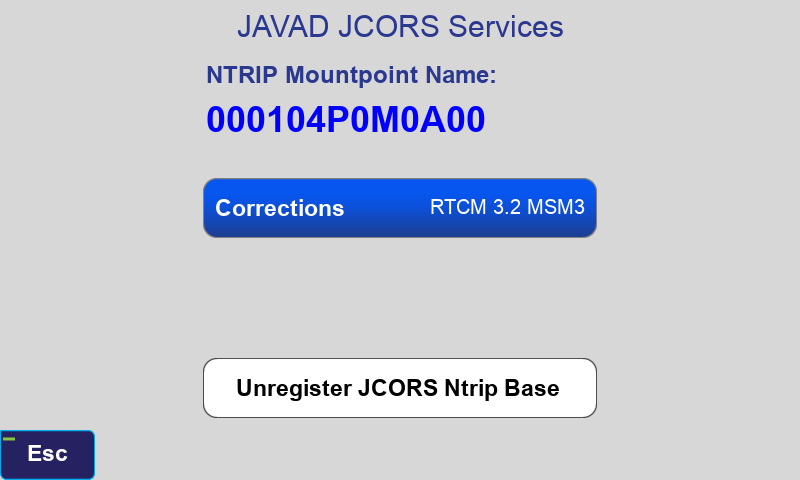
Before starting the base select the JCORS tab and press Apply To Rover. This will create the APN in J-Field and switch the correction source to it.
JCORS is now ready to use.
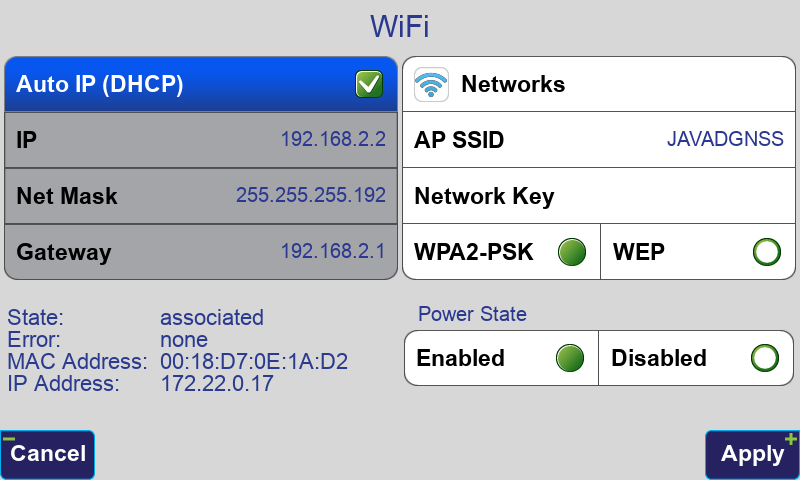
For this to work, the base receiver must be connected to the internet through LAN, WiFi or through its cellular modem. The network connection can be configured in the TCP Output Server screen.
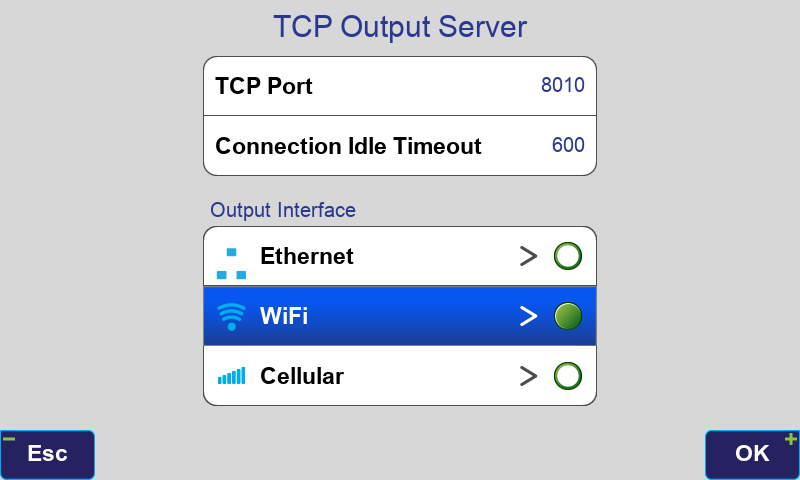
To configure a WiFi network you need to know the AP SSID (network name), Network Key (password) and security type (WPA2-PSK or WEP). Auto IP should be enabled. Networks helps to browse available networks in view of Triumph-LS and set AP SSID.